Onboarding Completion
Your FREE Gift Is Just Around The Corner, ...

SMTP Setup
This tutorial teaches you how to set up your SMTP.
How To Set Up Your SMTP
Objective
This is a step-by-step guide for setting up and using SMTP in the White Label Suite to send Welcome Emails.
Step 1
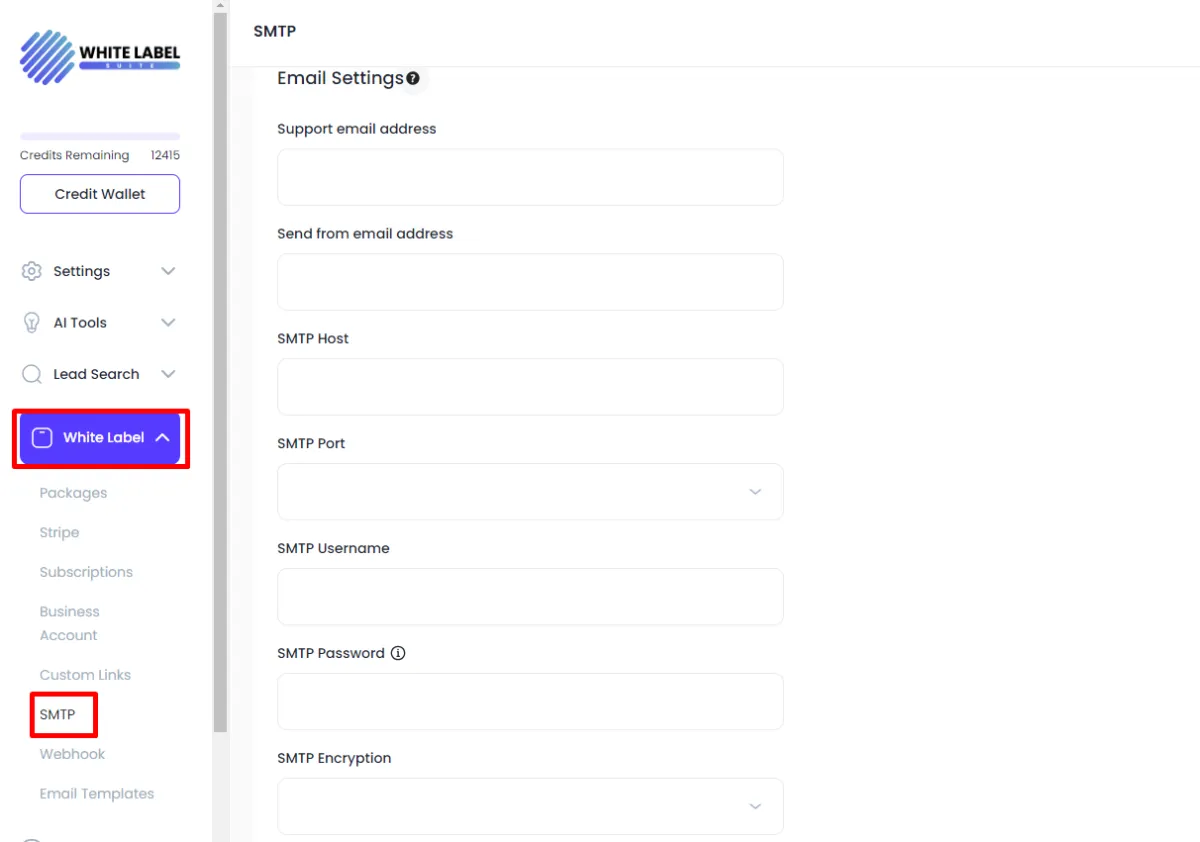
Navigate to the SMTP Section:
Go to the White Label section of the platform.
Scroll down to find and select the SMTP section
Prepare SMTP Information:
You will need the following details from your SMTP provider:
SMTP Host (e.g., smtp.gmail.com for Google).
SMTP Port (typically 587 for TLS).
Username (usually your email address).
Password (password associated with your email address).
Encryption Type (TLS or SSL).
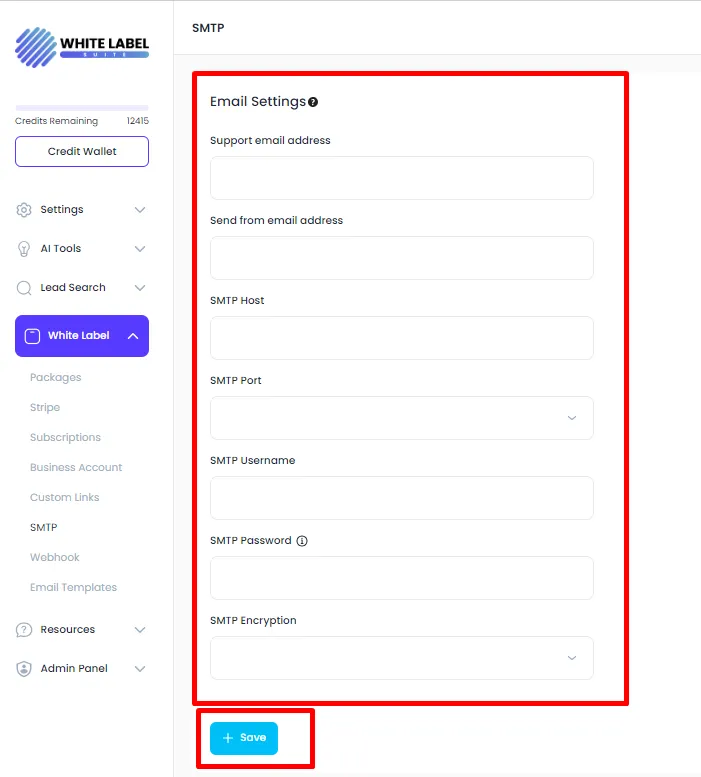
Step 2: Configure SMTP Settings
Enter Host and Port Information:
In the SMTP settings page, input the following:
Host: Enter the SMTP server address (e.g.,
smtp.gmail.comfor Google).Port: Enter the SMTP port number (typically
587for TLS).
Enter Authentication Details:
Username: Enter your SMTP username, usually your email address (e.g.,
[email protected]).Password: Enter the password for the SMTP account.
Select Encryption:
Choose the appropriate encryption type (usually TLS for Google).
Save Settings:
Click on the Save button.
A message will confirm that the settings are stored successfully.
Step 3: Set Up Email Addresses
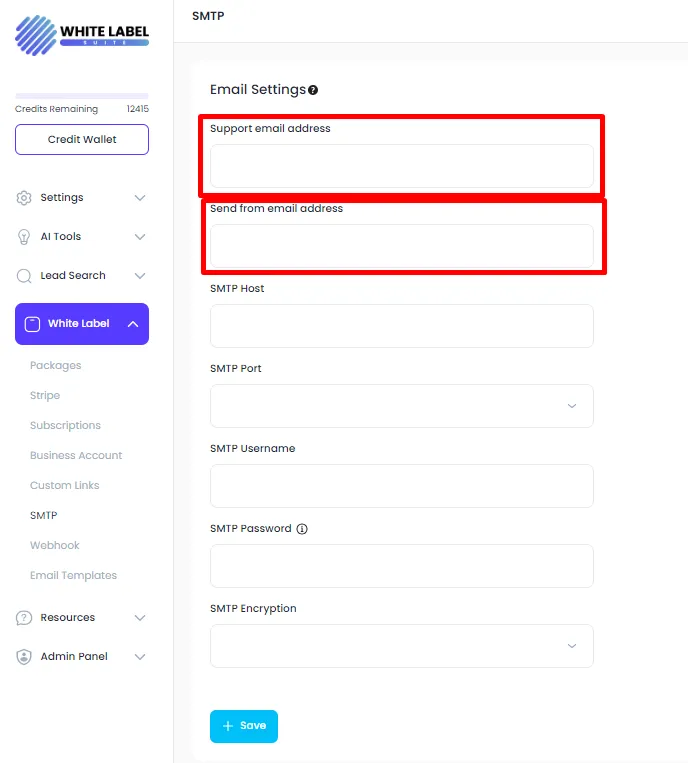
Support Email Address:
Enter the email address for customer support in the designated field (e.g.,
[email protected]).This address will appear in the top menu of the platform.
Sending From Email Address:
Enter the email address that will appear as the sender for outgoing emails (e.g.,
[email protected]).This email will be used for sending:
License emails.
Access reminders.
Password reset emails.
Step 4: Verify SMTP Settings
Check Settings:
Ensure all entered details are correct.
Verify that the host, port, username, password, and encryption type are accurate.
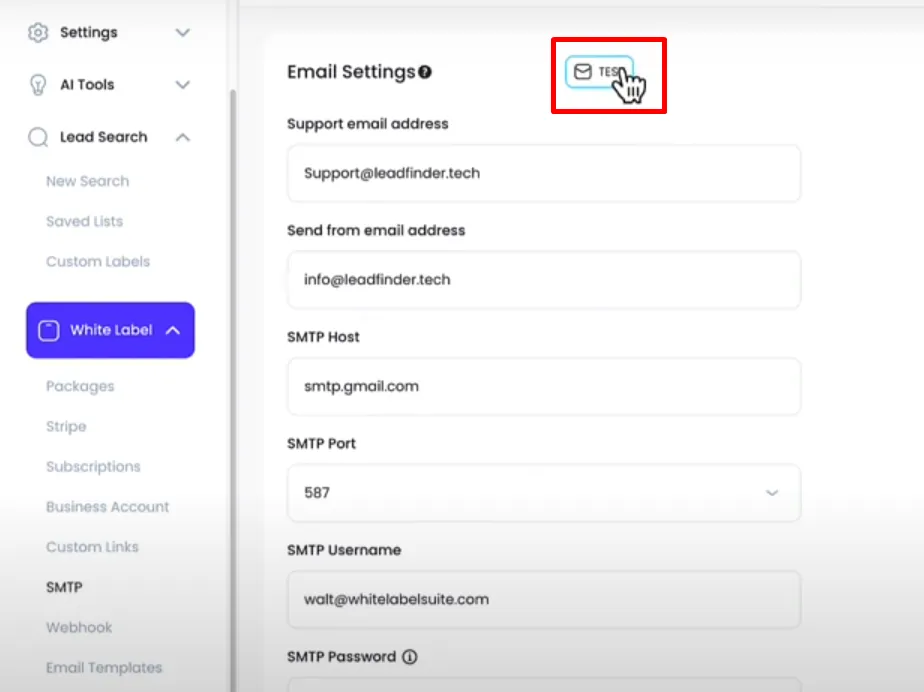
Test Email Configuration:
Send a test email from the platform to verify that the SMTP configuration is functioning correctly.
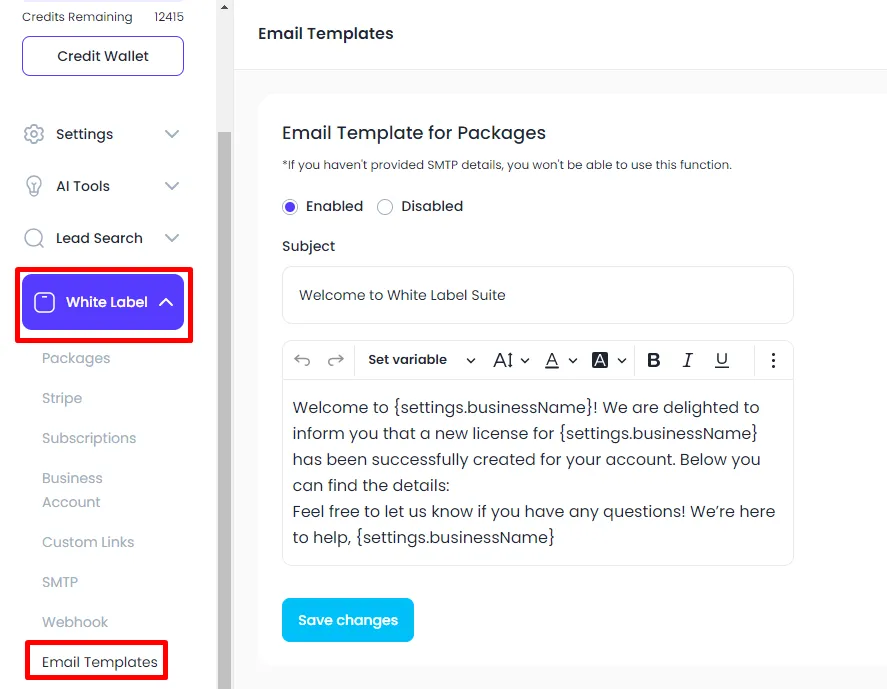
Step 5: Customize Email Templates
Navigate to Email Templates:
Go to the Email Templates section after setting up SMTP.
Customize Welcome Email:
Update the welcome email template for new customers who purchase a license.
You can use variables such as:
Package Name: The name of the purchased package.
Login Location: URL where users can log in.
Password: User’s initial password.
Edit Content:
Personalize the email content using the available variables to make the message specific to the customer.
For example:
Hi [Customer Name],
Thank you for purchasing [Package Name]. Your login credentials are:
Username: [Email]
Password: [Password]
You can log in here: [Login Location]
Save Template:
Save the updated email template once all changes are made.
Step 6: Final Verification and Testing
Run a Test Email:
Send a test email using the newly configured SMTP settings to ensure everything is functioning correctly.
Confirm that the email is received with the correct sender information and template content.
Verify Email Delivery:
Check for successful delivery and appearance of the email.
Ensure all links, variables, and content display as expected.