
Onboarding Completion
Not Far Off From Your FREE Gift, ...

Manage Subscriptions
This tutorial teaches you how to Manage Subscriptions.
How To Manage Subscriptions
Objective
This is a step-by-step guide for managing subscribers and accounts within the White Label Suite software.
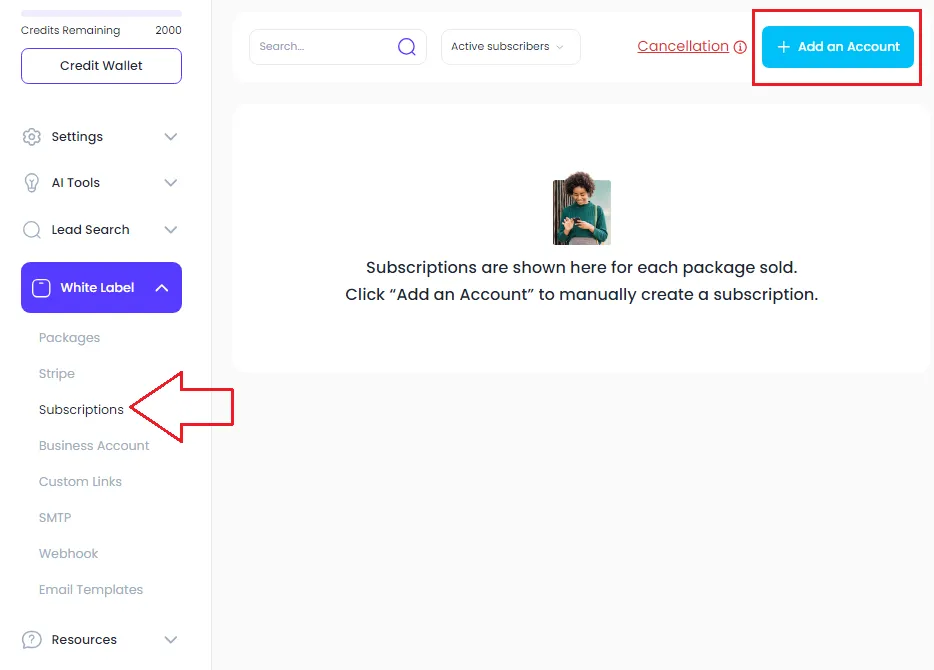
Step 1: Access Subscriptions
Navigate to the White Label Suite section of your program.
Click on the Subscriptions button located on the left side of the screen.
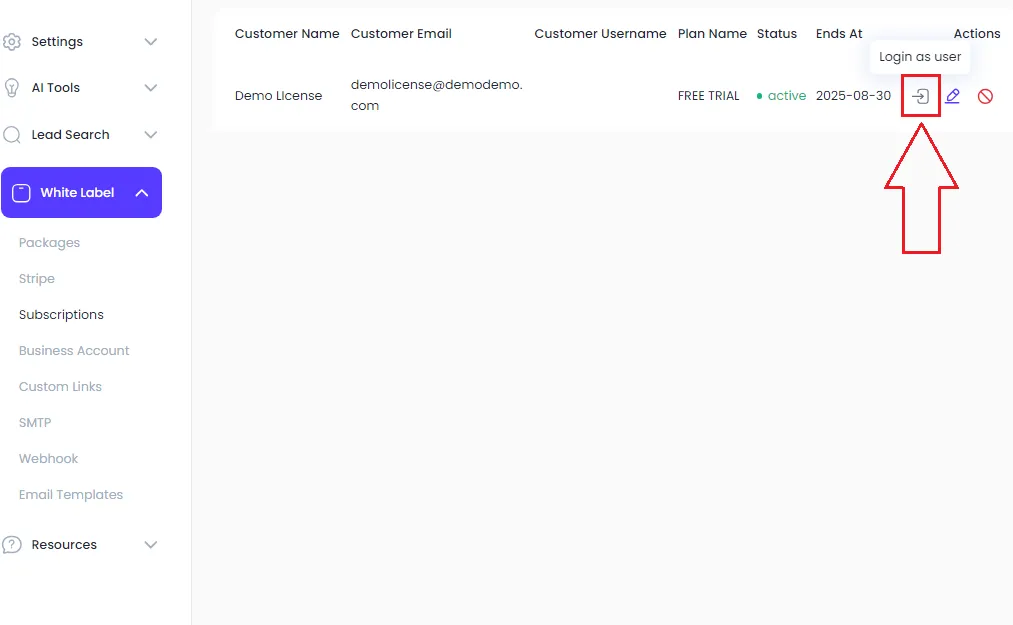
Step 2: Log in as a User
Find the user account you want to manage.
Click on the log in as user icon (a doorway with an arrow) next to their name.
You will be logged into their account to view and understand their experience.
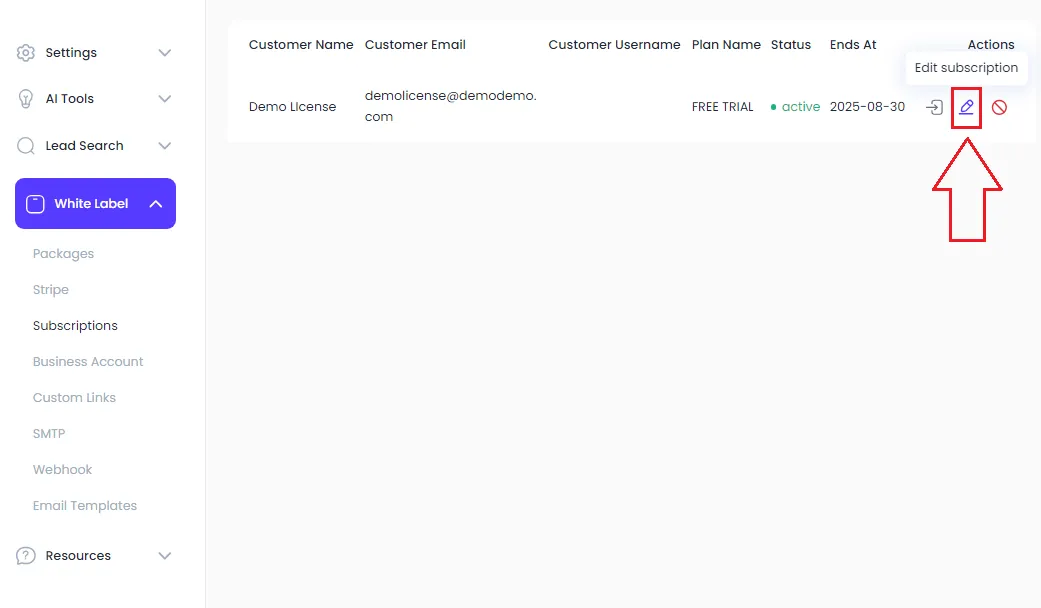
Step 3: Edit Subscription
Select the user account you wish to edit.
Click on the Edit button.
Update their name, email, and password as needed.
Change their subscription plan if required.
Step 4: Manage Credits
If needed, add additional credits to the user’s account.
Enter the amount of credits you wish to add (e.g., 2,000 credits).
Note that this will draw from your available credit pool.
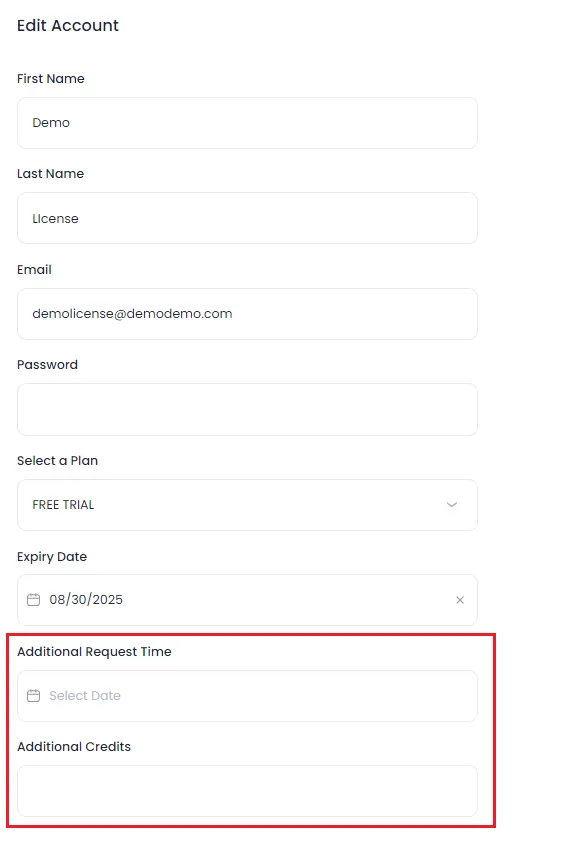
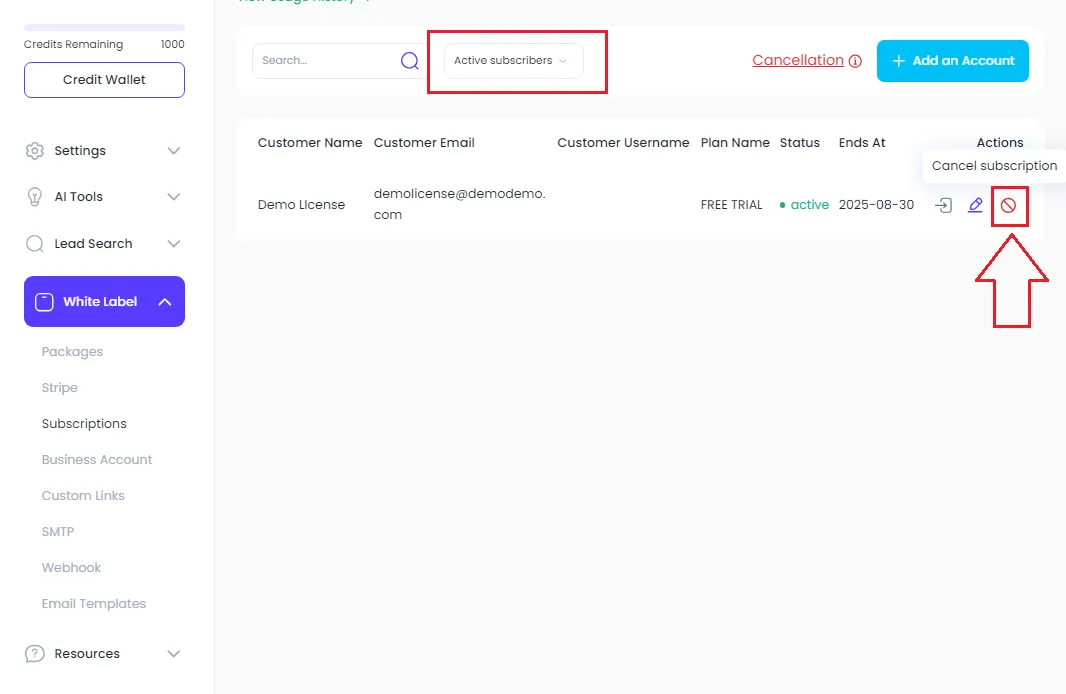
Step 5: Extend or Expire License
If the user needs an extension, adjust the expiration date of their license.
Alternatively, if the user stops paying, you can set their license to expire.
Step 6: Delete Account
For inactive users, click on the Delete button.
The account will be moved to the canceled subscribers section.
Step 7: Review Changes
After making changes, ensure you click Update to save the modifications.
Step 8: Manage Subscriber Dashboard
Monitor and manage all active and canceled subscribers from the Subscriptions panel.