
Onboarding Completion
Get Your Demo On, ...
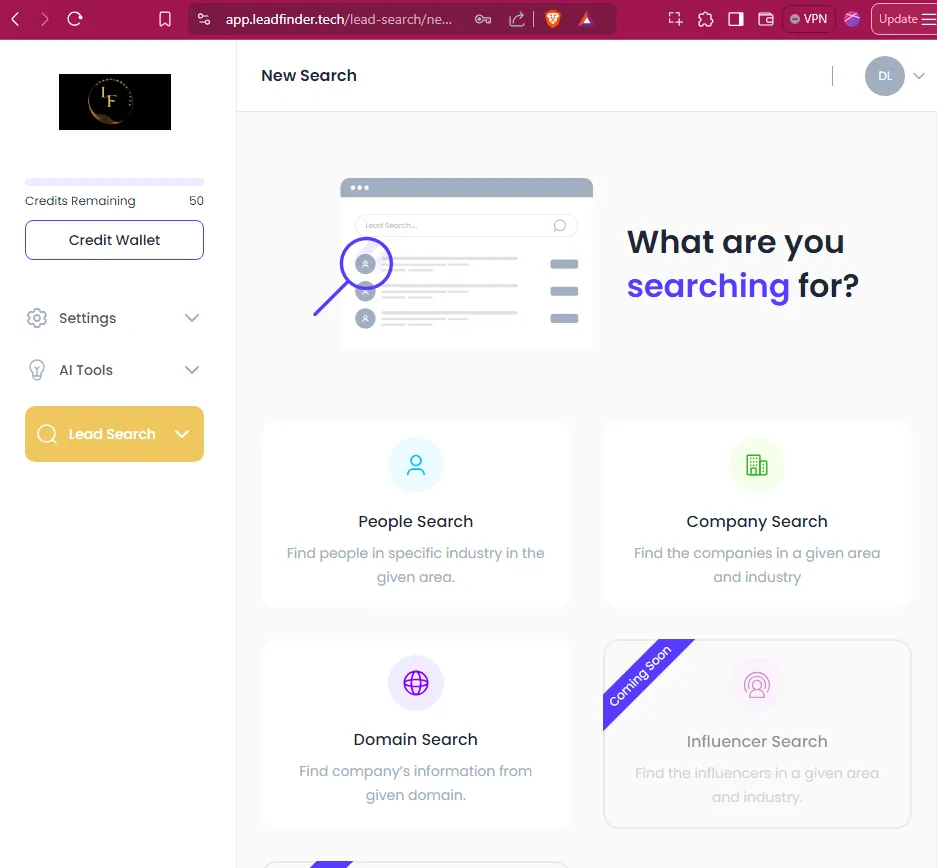
Create Demo Account
This tutorial teaches you how to create a Demo Account.
How To Create A Demo Account
Objective
This is a step-by-step guide for setting up and managing demonstration accounts within your branded account system.
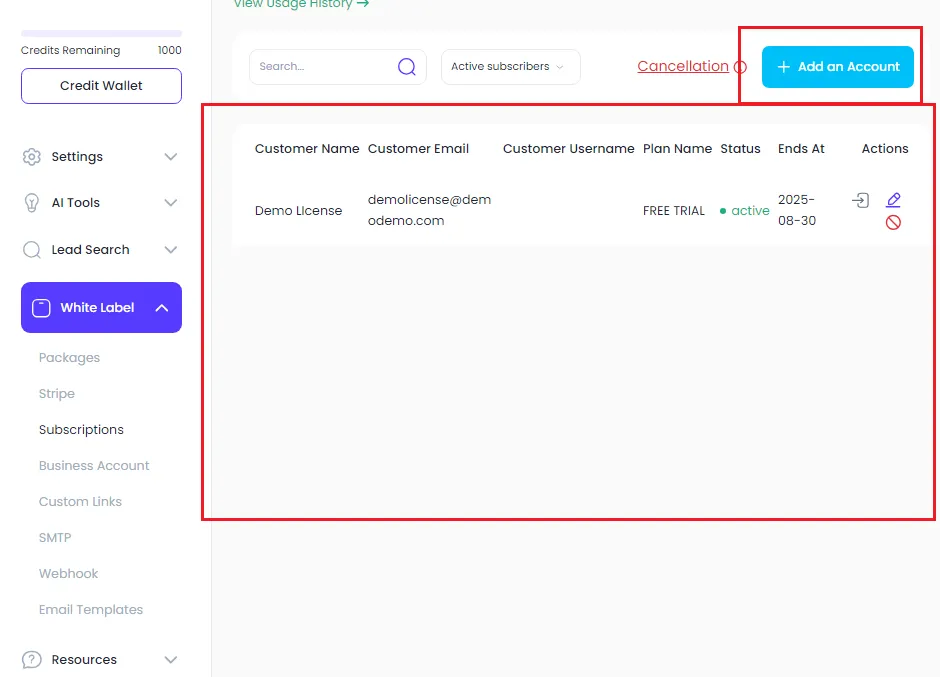
Step 1: Access Subscriptions
Navigate to the Subscriptions section from your menu.
Click on Add Account to create a new account for yourself.
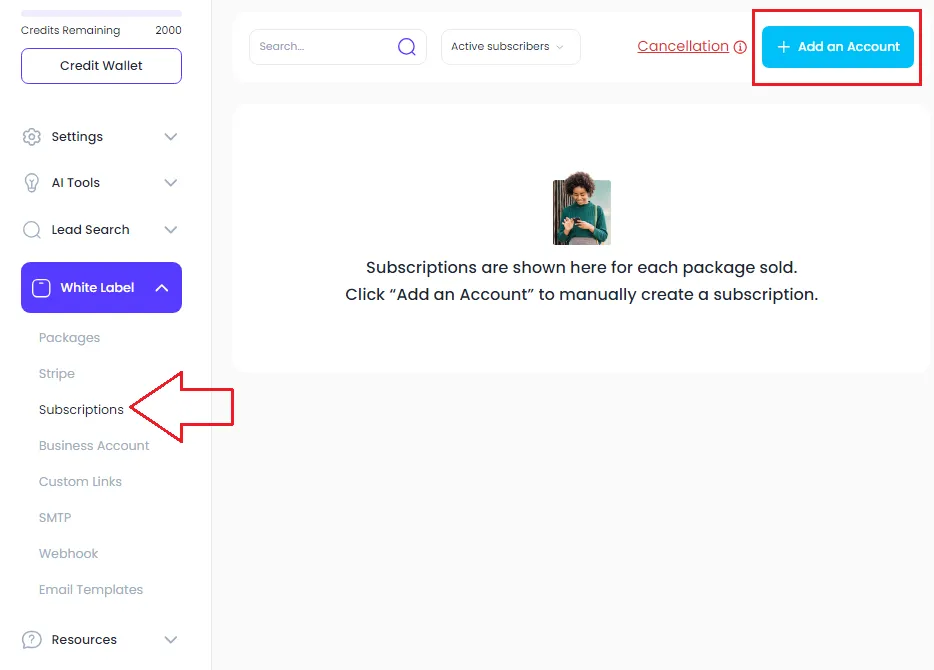
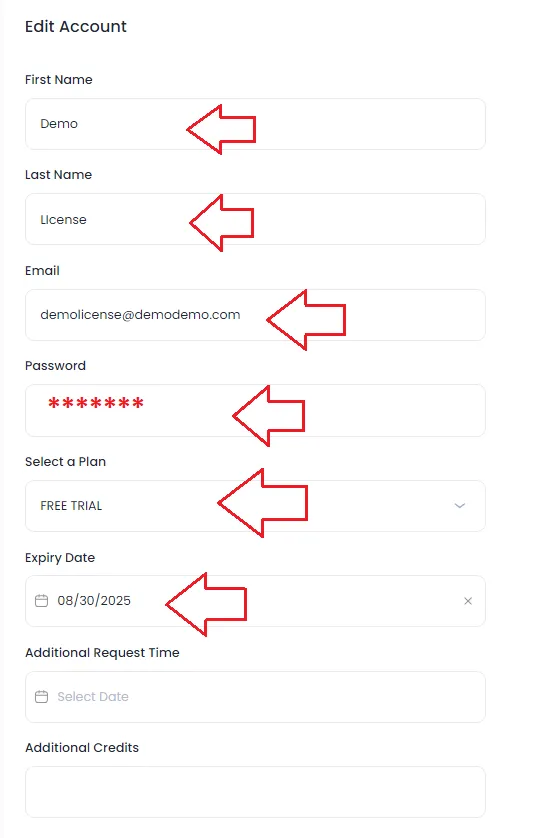
Step 2: Create a Subscription for Yourself
Enter a username and password for your demonstration account.
Select the plan/package you want to be associated with.
Set the expiry date for the subscription (e.g., one year from the current date).
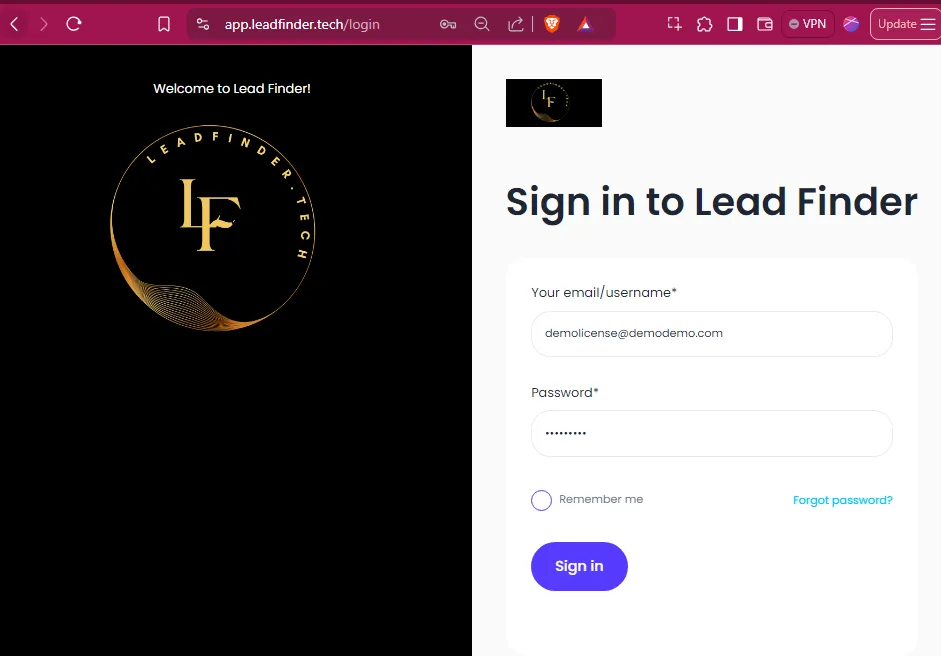
Step 3: Set Up Your Branded Account
After creating the subscription, refresh the login screen.
Use the newly created username and password to log in.
Verify that your account displays your logo and colors as set in your branding.
Step 4: Demonstrate Using Your Account
Use your branded account to demonstrate the system to clients, either via Zoom calls, iPads, or face-to-face meetings.
Step 5: Add Additional Accounts
For additional free licenses, return to the Subscriptions section.
Repeat the process of adding an account by entering a new username and password.
Assign these accounts to an active plan/package.
Step 6: Manage Team Logins
In the next videos, learn how to add team members or allow clients to add their own team if they purchase multi-seat licenses.
Step 7: Review and Adjust
Regularly review and adjust account settings as needed, including expiry dates and package assignments.