Onboarding Completion
Customizable Sales Pages, !
Create Sales Pages
This tutorial teaches you how to Create Sales Pages.
How To Create Sales Pages
Objective
This is a step-by-step guide to setting up a sales page for a package, customizing it, and sharing the link to start collecting payments.
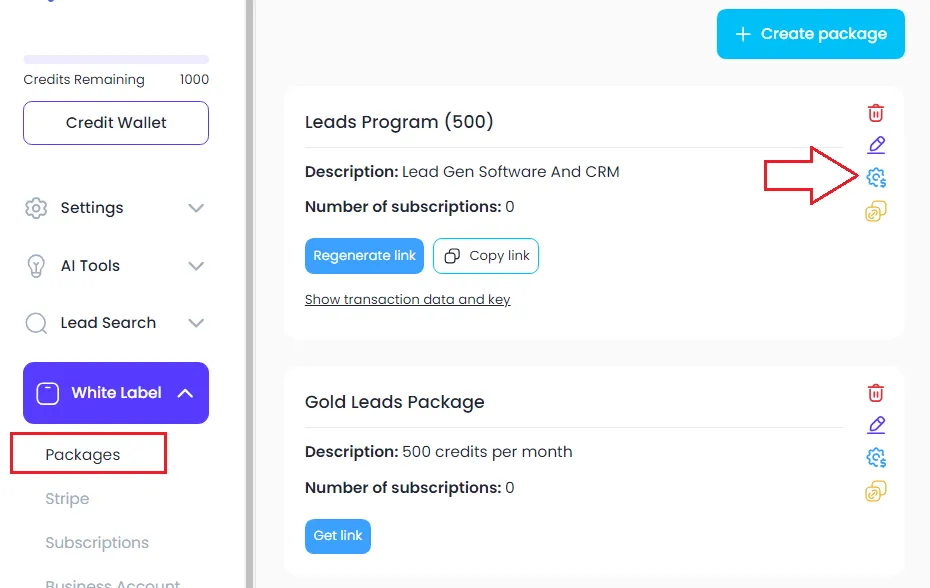
Step 1: Access Sales Page Settings
After creating a package, click the sales page settings icon (the cog with the blue dollar sign) next to the package to open the sales page customization screen.
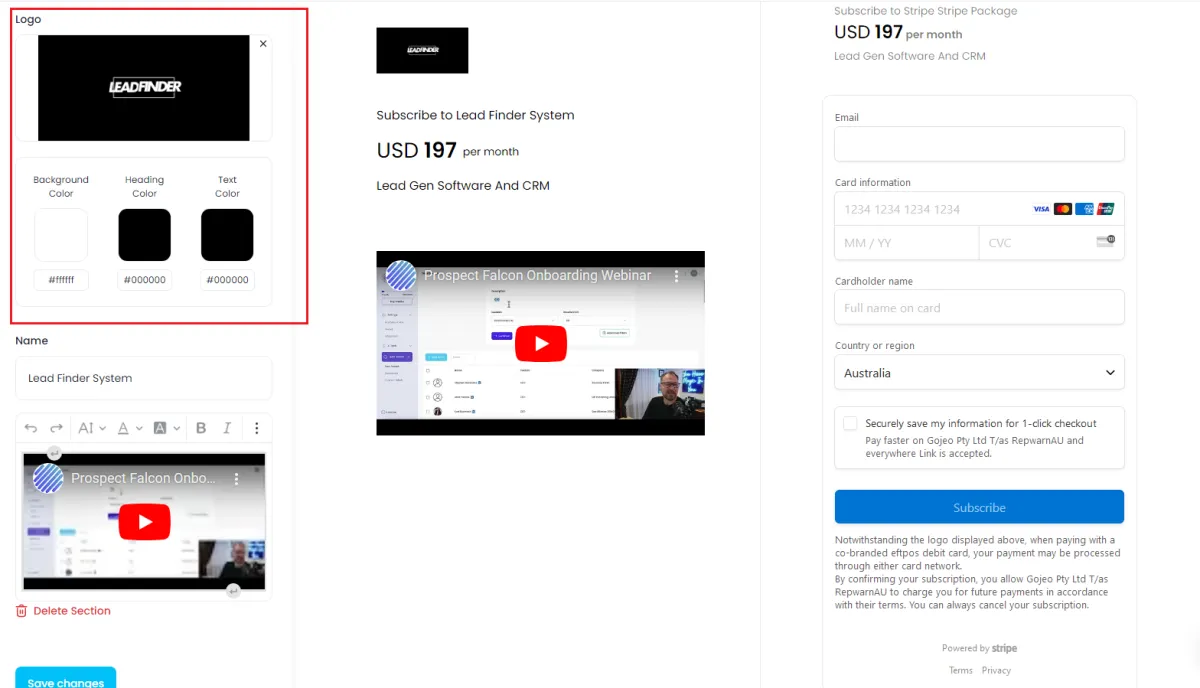
Step 2: Customize the Sales Page
Add your logo by clicking on the logo area and uploading your image.
Adjust the colors for the background, heading, and text to match your branding.
Step 3: Modify or Add Descriptions
Edit the description of your package. Add any additional details by clicking Add New Section (e.g., "Includes full license with up to five users for the leads generation software").
Step 4: Add Multimedia (Optional)
If desired, add a video or image by clicking on the three dots. You can paste in a YouTube link or upload an image to further enhance the page.
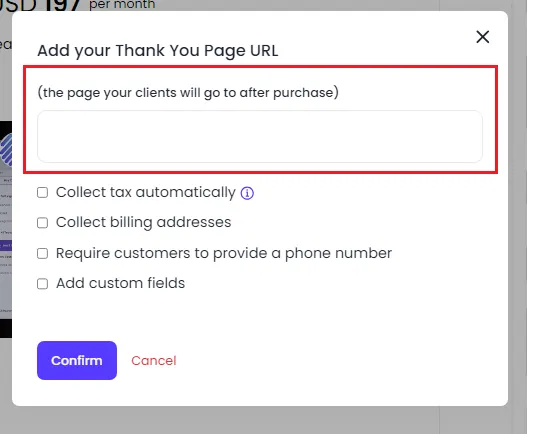
Step 5: Save and Configure Thank You Page
Click Save Changes.
Choose the Thank You Page that customers will be directed to after purchase. This could be an onboarding video, a message thanking them, or a link to schedule a call with your team.
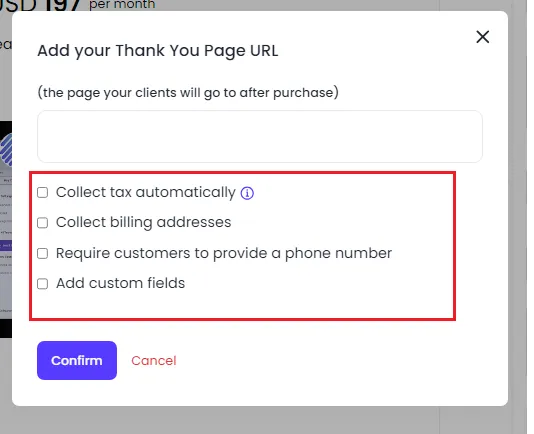
Step 6: Set Tax and Contact Fields
Decide whether to collect tax on the checkout page. This is set up in Stripe.
Choose whether to collect additional customer information, like phone number or address.
Add any custom fields if necessary (e.g., "Where did you hear about us?").
Step 7: Confirm and Finalize the Sales Page
After configuring the sales page and thank you page, click Confirm.
You will now see an orange link for your sales page, which you can share via messenger, embed in a buy button, or use in other communications.
Step 8: Share the Sales Page Link
Share the sales page link to start collecting payments. The page will display your package details, pricing, and setup fees, allowing customers to make a purchase immediately.